Using Splash Tools Choose the Brush head you would like to use. This window shows the big selection of brushes. Use the sliders to choose a brush, and change the size of the brush. Animate it by checking the box, as shown. There are 21 brushes for you to use - try them all! Brushes get mounted on Splash tools, as shown below. Choose the Colors wheel to select your brush colors. Use your mouse to move the color selector target around the color circle to choose the color (it is at the left side of the circle in this example). The swoop below the circle lets you choose how light or dark the color will be. The Variation slider will cause your brush to cycle through the family of colors you selected, and you can adjust how much variation to include. Turn Variation off when you are painting with one specific color. Try adjusting the Opacity to let other brush strokes show through your work. The Peekaboo! bar lets you see your Variation and Opacity settings in real time. Sling Tool: brushes connected by springs - doing crazy things... Pen Tool: Basic lines and orbits - for careful drawing, or automatic patterns
Wipe Tool: Rows of brushes - choose how many and how they wipe
Clear/Fill Tool: One expanding or contracting brush - great for mandalas
Shape Tool: Add and arrange shapes - including art from your own Gallery!
Each tool has its own control fly-out. Below is the Wipe Tool version, allowing you to change the brush count, the span between brushes, and the brush bend as you paint.

Saving your work Make sure and save your work! When you choose save you get a chance to name your art. Choose OK and wait for a bit. You will see the"Finished" window. Add to My Gallery takes you to the ArtThread "Save Art" page. New Drawing leaves your saved work in a buffer and let's you start a fresh one right away. Continue Drawing puts your saved work in a buffer and let's you continue to work on the same piece. Great for saving the various progressions of making a piece! Creating art with art! The Shape tool opens up a world of creative possibilities. Make sure you are logged into your account before you start Splash, then choose the Shape tool from the left tool bar. The bottom flyout has two icons (shown at left) that will allow you to import your art into your Splash canvas: A Choose art from My Gallery - your Art or your Favorites.
Folder Choose an image from your computer - scans, photos, or any image you may have.
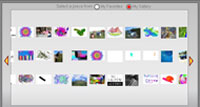
When you choose art from My Gallery the Splash art chooser (below left) will display thumbnails of your art. Choose a piece and you will then see it in the Shape tool flyout (in the yellow circle below right). Click on that art and your cursor is now loaded and ready to stamp!   The Splash canvas shown below illustrates how you can stamp your art multiple times, and at various angles and sizes. Your art becomes a stamp you can use as often as you like, and by shrinking, growing, and rotating your art you can create some amazing effects. This is a wonderful way to collaborate with your friends and family. Anyone can start a piece and post it to a thread on the Gallery. Then a friend can make it a Favorite, bring it into the Splash canvas, and add their own creative juice. Then it’s on to another person, or the rest of the class. The possibilities truly are endless. Imagine the collages you can make when you stamp a new and different piece of art each time! | 


